
Kubernetes Audit Log available on Exoscale SKS
You can now send Exoscale-managed Kubernetes (SKS) audit logs to the webhooks of your choice
Read More →Previous Articles

Sovereign Cloud And Data Sovereignty: An Overview
Understand data sovereignty and sovereign cloud: Key definitions, benefits, and practical steps for compliant cloud strategies.
Read More →
Safe, Verifiable AI Code Generation for Mission-Critical Systems
Accelerate AI innovation in regulated industries with verifiable, compliant, and high-performance solutions—where speed meets trust and sovereignty.
Read More →
AI Meets Formal Methods: Deploying HES-SO’s Verified Code Pipeline on Exoscale
Proactive Code Security: Combining Scala’s Type System, Formal Verification, and Exoscale’s Cloud Infrastructure
Read More →
Exoscale’s New Karpenter Integration: Simplifying Kubernetes Node Management
Exoscale Scalable Kubernetes Service (SKS) has long time support for cluster-autoscaler to automatically adjust the number of nodes in a Kubernetes cl...
Read More →
CLOUD Act vs. GDPR: The Conflict About Data Access Explained
Understand the conflict between U.S. CLOUD Act and GDPR: Key risks, safeguards, and practical steps to stay compliant.
Read More →
Your Next Innovation Is Already in Your Data
Managed Apache Kafka: Your future-proof foundation for data in motion. Achieve scalability, resilience, architectural freedom, and EU data privacy com...
Read More →
From 24 Hours to 24 Milliseconds: The Proof of a Real-Time Business
Learn how Exoscale managed Apache Kafka enables real-time fraud prevention, instant e-commerce personalization, and IoT insights. Transform your busin...
Read More →
Innovation, Not Operation: The True Cost of Your Data Infrastructure
Solve Kafka's operational complexity while ensuring European data compliance. Discover how managed Kafka on a sovereign cloud reduces costs & accelera...
Read More →
React at the speed of data
Adopt Apache Kafka: the proven event streaming platform used by Fortune 100 companies to build real-time enterprises and unlock instant data insights.
Read More →
Your Kubernetes: Strategic Asset or Ticking Time Bomb?
Is your in-house Kubernetes platform a silent powerhouse or a ticking time bomb? Discover the hidden costs and security risks of DIY K8s and learn why...
Read More →
Exoscale’s New Bucket Replication Feature: Secure, Automated S3 Data Sync
Exoscale’s New Bucket Replication Feature: Secure, Automated S3 Data Sync
Read More →
Leveraging Exoscale Nested Virtualization Using Multipass
Using Multipass and Exoscale Nested Virtualisation to run a kubeadm cluster
Read More →
Exploring Different Storage Options at Exoscale
Discover Exoscale's Block Storage, Local NVMe Storage, and Object Storage. Compare their benefits and learn when to use each for your Kubernetes and C...
Read More →
Revamping the SKS Node OS Image: Performance, Tooling, and Security
SKS/Kubernetes 1.32 Node OS Template Revamp
Read More →
Sign Container Images With Cosign
Learn how to use cosign to sign and verify container images within a software supply chain
Read More →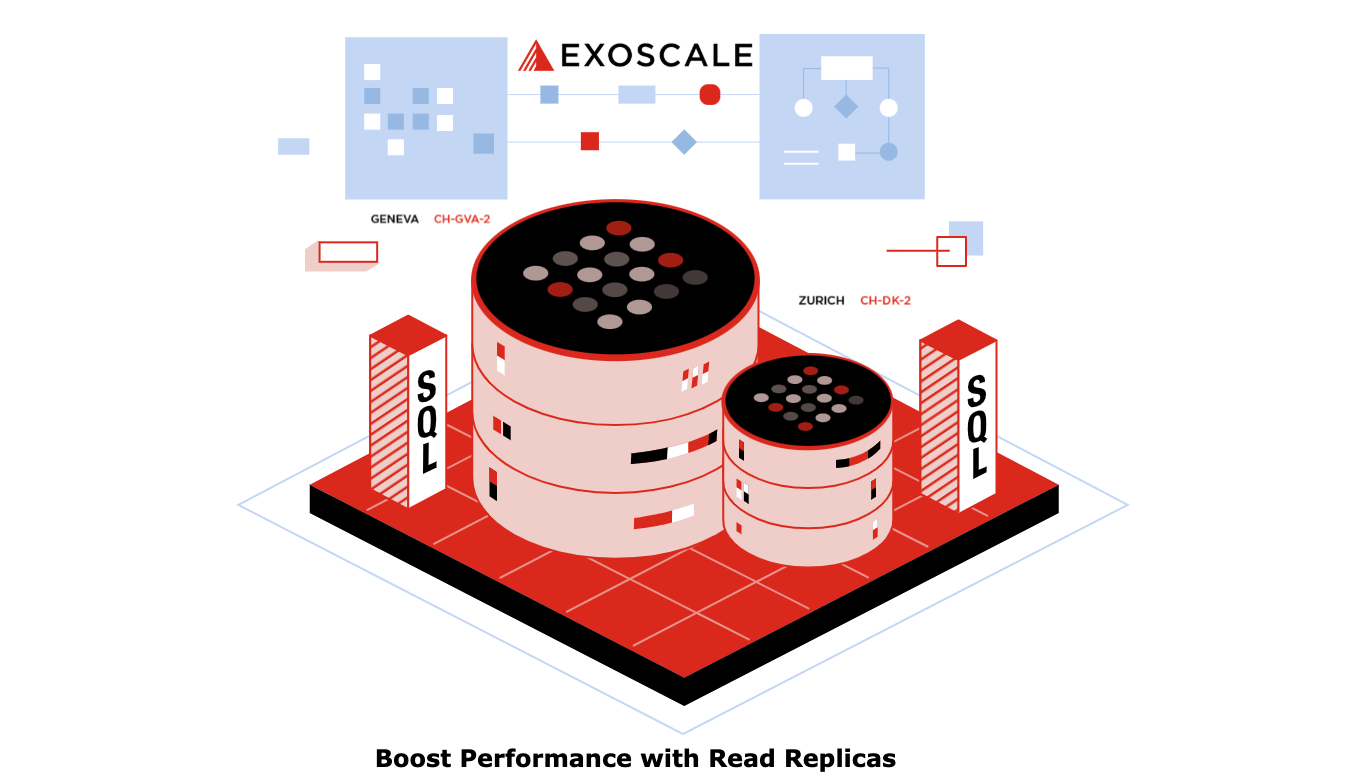
Boost Your Database Performance with Exoscale’s Read Replicas
Read Replicas for PostgreSQL and MySQL
Read More →
Enhancing Your DBaaS Operations with External Integrations
DBaaS External Integrations (Datadog, Prometheus, Rsyslog, Elastic/OpenSearch
Read More →
Connecting to your cluster using Dex
Learn how to configure an SKS cluster with Dex to enable access through GitLab as the identity provider
Read More →
Conditional Writes Now Available in SOS
Conditional writes are now available in SOS, preventing race conditions during object creation
Read More →
Connecting to your cluster using GitLab and OIDC
Learn how to configure an SKS cluster with OIDC to enable access through GitLab as the identity provider
Read More →
A deep dive into Exoscale SKS internals
Learn how Exoscale manages its SKS managed Kubernetes cluster under the hood
Read More →
How to deploy stateful Kubernetes workloads on Exoscale SKS
Learn how to deploy stateful Kubernetes workloads on Exoscale SKS with ease!
Read More →
How to migrate a virtual Instance from VMware vSphere to Exoscale
Learn how to migrate a virtual Instance from VMware vSphere to Exoscale with ease. Get started now!
Read More →
Understanding Vault: A Guide to Glasskube's Managed Service with a Kubernetes Integration Demonstration
Explore Glasskube Vault, a fully managed Vault service available on Exoscale's marketplace. Learn how to easily subscribe and integrate Vault with Exo...
Read More →
Leverage the Power of Istio on Exoscale SKS for Enhanced Kubernetes Experience
Istio is an open-source service mesh platform that helps developers manage, secure, and understand the interactions between microservices in a Kuberne...
Read More →
Announcing Vienna-2 Zone General Availability
Further expanding our presence in Europe, we are happy to announce we are bringing our Cloud insfrastructure to a second zone in Vienna, Austria.
Read More →
Exoscale is TISAX certified
Exoscale is TISAX Level 2 certified and once more strengthens the high security standards, valuing data protection of its customers. Read more!
Read More →
Streamlining Monitoring Deployments with Infrastructure as Code
Automating Monitoring Stack Deployment on Exoscale with Terraform and Ansible
Read More →
Automating Instances: Start and stop after schedule
Use a small Linux instance with a cronjob to trigger events via the Exoscale API to start and stop instances after schedule. Read the full guide!
Read More →
Hosting your own social network using Mastodon and Exoscale
Using Mastodon you can host your own social network on Exoscale and federate it with other instances. Read more!
Read More →
It’s a full decade of Exoscale
We are celebrating 10 years of Exoscale. Take a deep breath and let’s travel back to where it all started.
Read More →
cert-manager and Exoscale DNS - Manage SSL certificates with ease
Manage certifications in a K8s environment easily with cert-manager. Learn how to simply set up cert-manager on Exoscale in our blog post.
Read More →
NAT Gateway - A simple example on how to achieve a fixed outgoing IP for SKS
Using a DaemonSet in Kubernetes, it is possible to route traffic through a separate gateway. Read more in our blog.
Read More →
Fall 2022 compute and EUR pricing adjustment
Important communication about our pricing for fall 2022
Read More →
Terraform - Combining SKS with DBaaS in one go
Get your apps running in minutes by using Terraform together with Exoscale Managed Kubernetes (SKS) and DBaaS. Read more!
Read More →
Continuous delivery with ArgoCD and SKS - Part 1
Deploy faster and safer by using continuous delivery with ArgoCD and SKS. Part 1: Learn how to create an SKS cluster using Terraform.
Read More →
Introducing Security Groups External Sources
Security groups are gaining in flexibility with the ability to add external sources as objects
Read More →
Storage on SKS made easy: Longhorn
Store your data securely inside your Kubernetes cluster with the open-source software Longhorn.
Read More →
DBaaS - General Availability & Data Protection
Our Database as a Service (DBaaS) offering has reached General Availability. Read all about our latest milestone and how your data is protected within...
Read More →
Cloud Pricing Models Explained: A Guide to Understanding Your Options
On-demand, spot, reserved, volume - different cloud pricing models each with pros & cons. Learn all about the different pricing models available!
Read More →
SKS - A Continuous Development of our Kubernetes Service
Six months ago we introduced our Scalable Kubernetes Service (SKS). Read about the development and our certification by the CNCF.
Read More →
Storage encryption with Exoscale Flexible Storage template, LUKS and HashiCorp Vault
Exoscale Flexible Storage template empowers users to resize and/or create disk partitions as they deem fit, thanks to the flexibility provided by the ...
Read More →
Exoscale Flexible Storage (compute instance) template
A new Debian-based template, leveraging a UEFI/GPT partition table and LVM partitioning for flexible storage management.
Read More →
Introducing DBaaS - Database as a Service
Database as a Service (DBaaS) is now available on the Exoscale platform. Securely deploy relational and distributed databases on Exoscale.
Read More →
Easily deploy an SKS cluster on Exoscale with Terraform
Easily deploy an SKS cluster on Exoscale with Terraform
Read More →
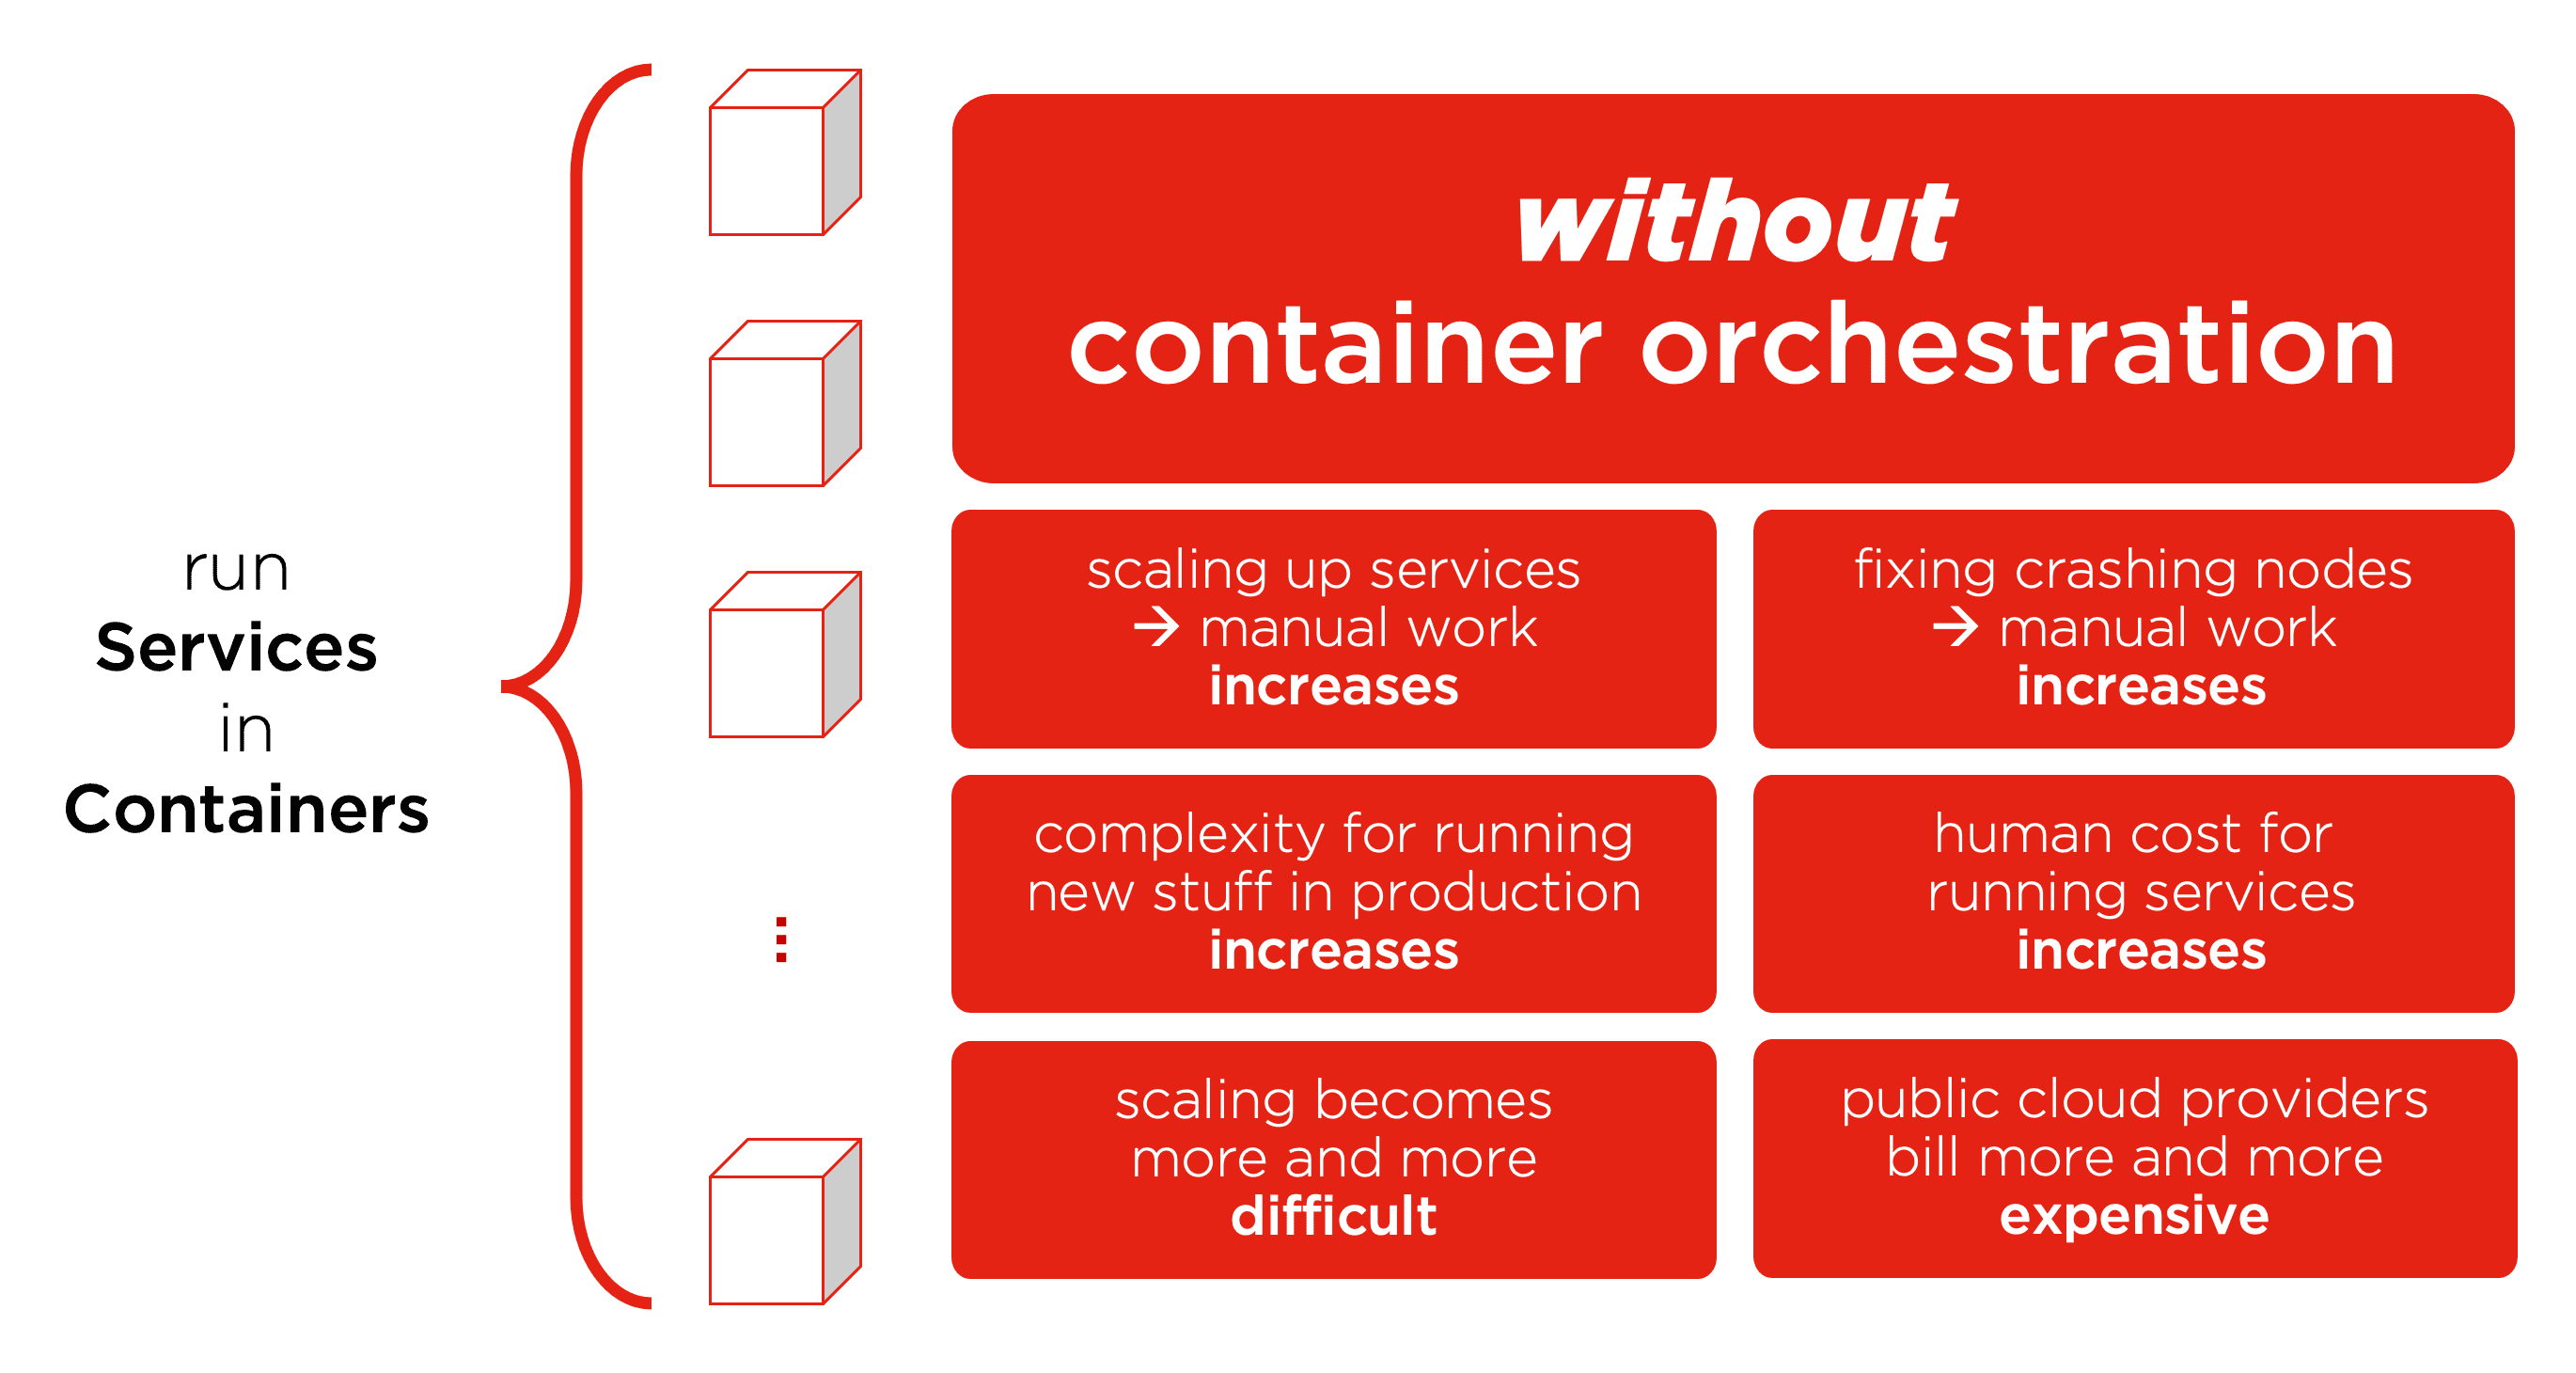
Explaining Kubernetes and Container Orchestration
Explaining Kubernetes and Container Orchestration
Read More →
Introducing SKS - Scalable Kubernetes Service
Introducing SKS - Scalable Kubernetes Service - and Exoscale Container strategy
Read More →
Exporting a snapshot from Exoscale and registering it as a Custom Template
Exporting a snapshot and registering it as a custom template for faster deployments
Read More →
Introducing the Exoscale CDN Integrated Service
Introducing our integrated CDN service built in cooperation with Ducksify and Akamai to publish your assets to the Edge.
Read More →
Container-Optimized Instances
Container-Optimized Instances are designed to run Docker containers at startup: your container is available on the Internet in a matter of seconds!
Read More →
GAIA-X cloud initiative from Europe for Europe
GAIA-X cloud initiative for sovereign infrastructure and data-services is supported by Exoscale
Read More →
QNAP QuTScloud officially supported on Exoscale
QuTScloud is a cloud-optimized version of the QNAP NAS operating system that you can deploy on Exoscale
Read More →
Exoscale Packer Plugin
With the new official Exoscale Packer plugin you can easily automate the creation of up-to-date templates to be used in your infrastructure
Read More →
Exoscale Kubernetes Cloud Controller Manager
Thanks to the transparent bridging of k8s functionalities to corresponding Exoscale resources, deploying Kubernetes workloads gets easier than ever.
Read More →
New CPU Optimized and Memory Optimized Instance Types
Thanks to CPU and Memory Optimized Instances you can deploy on specialized solutions that enable improved cost/performance ratio for your workloads.
Read More →
Backup Your Database on Exoscale With Backup Ninja
Backup Ninja lets you schedule backups with full flexibility, and your data will not leave your country nor our platform, staying under strict GDPR co...
Read More →
Getting started with the Exoscale Network Load Balancer
The Exoscale Network Load Balancer service allows users to create Layer 4 (TCP/UDP) load balancers.
Read More →
Introducing the Exoscale Network Load Balancer
The Exoscale Network Load Balancer service allows users to create Layer 4 (TCP/UDP) load balancers.
Read More →
Secure a CI/CD Chain on Exoscale with Vault - Part 2
How to take advantage of the Exoscale's IAM and Vault backend plugin to secure your CI/CD chain, part 2/2
Read More →
Secure a CI/CD Chain on Exoscale with Vault
How to take advantage of the Exoscale's IAM and Vault backend plugin to secure your CI/CD chain, part 1/2
Read More →
Creating Custom Templates Using Packer
Exoscale Custom Templates allow you to register your own templates for Compute instances. Learn how to create one using Packer.
Read More →
IAM General Availability
With IAM you can have detailed access control of your Exoscale infrastructure giving access only to selected services and commands.
Read More →
Build Highly Available Gitlab Runners Infrastructure Using Instance Pool
Build Highly Available Gitlab Runners Infrastructure Using Instance Pool
Read More →
Introducing Instance Pools
Exoscale Instance Pools will automatically deploy a given number of identical virtual machines and keep them up and running for you.
Read More →
How to Install Calico on Kubernetes or Bare Metal
How to Install Calico on Kubernetes or Bare Metal
Read More →
An Introduction to Calico: Container Networking at Scale
An Introduction to Calico: Container Networking at Scale
Read More →
python-exoscale: official Python bindings for the Exoscale API
python-exoscale is the official Exoscale Python binding to control your resources and integrate your application.
Read More →
Exoscale command line is now available as a snap!
It is now much easier to install the exoscale command-line tool on Ubuntu based systems, and more!
Read More →
Building Microservices in OSGi with the Apache Karaf Framework
Using Apache Karaf Framework to build Microservices
Read More →
Fast Logs: Optimize Logging for Large Architectures
In modern systems, logging it's a given. But what actually happens when we do log, what are the impacts on performance, and how can we improve it?
Read More →

Exoscale becomes an official Terraform provider
We are huge Terraform fans here at Exoscale, and it's our pleasure to announce that our provider is part of the official Terraform registry.
Read More →
Managed Private Networks available in all Zones and Web Portal
Exoscale's Managed Private Networks are now available in every Zone, and in the Exoscale portal too.
Read More →
How to ensure entropy and proper random numbers generation in virtual machines
Virtual Machines do not have the same behavior with randomness as physical servers. This is how you ensure proper entropy and reliable randomness in t...
Read More →
Introducing Custom Templates
With Custom Templates you can simplify your workflow by creating pre-configured virtual machines and custom OS
Read More →
Announcing Munich Zone General Availability
Further expanding our presence in Germany, we are happy to announce we are extending our Cloud platform with a new zone in Munich, Germany.
Read More →
Build a Highly Available Web Infrastructure Using Managed Elastic IP
Reduce service disruption and build a highly available web infrastructure on Exoscale with managed Elastic IP and health checks.
Read More →
Managed Setup and Health Check for Elastic IP
Exoscale Elastic IP gain improved functionalities as Managed setup and health check, allowing you to deploy high availability architectures in a breez...
Read More →
Circuit Breaker Pattern: Migrating From Hystrix to Resilience4J
A walk through the differences between Hystrix and Resilience4J, embracing functional programming in Java
Read More →
How to Integrate Spring With Micronaut
Micronaut supports many Spring features. This lets you use it for specific environments requiring small memory footprints and quick start times
Read More →
An important security notice regarding Microarchitectural Data Sampling (MDS) Vulnerability
An important security notice regarding Microarchitectural Data Sampling (MDS) Vulnerability
Read More →
Releasing a new GPU cloud offering based on NVIDIA Tesla V100
Start on-demand GPU virtual machines with up to 4 Tesla V100. Scale up your computational capabilities by reducing your costs.
Read More →
Java for Serverless: Ahead-of-Time compilation with Micronaut and GraalVM
The Java Virtual Machine (JVM) is designed for optimal performance in long running processes, i.e. application servers, without any specific requireme...
Read More →
Announcing Sofia Zone General Availability
Further expanding our presence in Europe, we are happy to announce we are bringing our Cloud insfrastructure a new zone in Sofia, Bulgaria.
Read More →
Configuration management: a Spring Boot use-case with Kubernetes
Let's explore the many options Kubernetes offers to configure the scheduled containers, and employ a simple Spring Boot application as a use-case.
Read More →
Digital signatures: software you can trust
Digital software signature is fundamental for security best practices. Here is how to implement it from the source-code do the final Docker image.
Read More →
Kubernetes zero downtime deployment: a Spring Boot use-case
This is how to achieve a zero downtime rolling update with Kubernetes using Spring Boot
Read More →
Kubernetes zero downtime deployment: when theory meets the database
A zero downtime deployment is actually possible. But things can become tricky if you have a database in between.
Read More →
Self-hosted Serverless services with Fn
Looking for a Serverless solution with no lock-in? This is how you may deploy your own service on the infrastructure of your choice.
Read More →
An alternative to Minikube in the Cloud
An easy way to deploy single-node Kubernetes clusters as you would do with Minikube, but on hosted virtual machines for real-life applications.
Read More →
Our best reads of 2018
Still looking around in despair for a Christmas gift for your software engineer sweetheart?
Or perhaps you are simply looking into your next read for ...
Read More →
Microservices Circuit-Breaker Pattern Implementation: Istio vs Hystrix
Here is how Istio and Hystrix differ in the implementation of the circuit breaker pattern, handling the lack of availability of a service.
Read More →
Docker Logging, a Hitchhiker's Guide
Docker Logging can be achieved in multiple ways. We'll go trough them to show you how to implement a proper production-ready docker logging setup.
Read More →
Integrate Evolutionary Database Design in your Continuous Integration Pipeline
Databases should be governed by the same Agile rules we apply to our code. Continuous Integration for databases allows you track and test your DB desi...
Read More →
Building a Continuous Delivery Pipeline using CircleCI and Docker
Deploying software can be a time-consuming process. Here is how you can improve things using CircleCI to set up a Continuous Delivery Pipeline.
Read More →
Introducing managed private networks
You can now configure a manged private network on Exoscale. It will automatically configure the IP addresses of your private network interfaces.
Read More →
What is Continuous Integration?
Continuous Integration starts from development best practices up to build automation, creating a predictable path for your application life cycle.
Read More →
What is devOps: a 2018 perspective
Where does the word devOps come from, what did it mean originally, and what are its challenges? Let's discover it with a guest post by Kris Buytaert
Read More →
Opening Object Storage in Vienna, Austria
An S3 compliant Object Storage solution in Austria, allowing you to keep your data in your country.
Read More →
How to secure a private Docker registry
In the last post, we had a look at how to set up a private Docker registry. Setting up a Docker registry requires some steps:
Install the Docker softw...
Read More →
Setting up a private Docker registry
What is a private Docker registry? How do you setup one up, how do you secure it? Find out how to setup a secure and private registry for your images
Read More →
Configuring Kubernetes Applications with kustomize
Switch froma an imperative to a declarative approach for you Kubernetes object management using kustomize.
Read More →
Releasing the official Exoscale command-line client
The official Exoscale CLI allows you to simplify the deployment of your infrastructure abstracting procedures behind magic
Read More →
Using RKE to Deploy a Kubernetes Cluster on Exoscale
This tutorial gets you up and running with using Rancher and RKE to deploy a Kubernetes cluster on Exoscale.
Read More →
Exoscale will be at GOTO Berlin and Golab 2018
We are building a nice lineup of events and opportunites to meet, and we are very excited to announce that Exoscale will participate in the following ...
Read More →
Simple backup on Exoscale with CloudBerry
Reinforce your data-loss prevention strategy with the CloudBerry backup solution on the Exoscale cloud platform
Read More →
TLS: how to get started securing web properties through HTTPS
A primer on TLS, Certificates and their automated deployment with Let's Encrypt ACMEv2. We answer a few common questions and present the benefits for ...
Read More →
How to write a Clojure application: a complete tutorial
How to build an entire Clojure application from scratch: a nice intro to the language we love.
Read More →
What is Hybrid Cloud?
Hybrid cloud increases the flexibility of your cloud application while reducing risk and vendor lock in. We discuss the pros and cons and look at tool...
Read More →
Easy Let's Encrypt wildcard certificates, with Lego and ACMEv2
Thanks to the recent release of LEGO, and its support for ACMEv2, you can now easily deploy Let's Encrypt wildcard certificates on Exoscale.
Read More →
Deploy and host a single-page application on Object Storage
Exoscale's simple Object Storage is an ideal and reliable place to securely host a static website or a single-page application.
Read More →
Build a single-page application with ClojureScript and re-frame
ClojureScript and re-frame make a great choice for building a functional, reactive programming, single-page application.
Read More →
Opening Object Storage in Frankfurt, Germany
Keep your data in Germany with our German Object Storage solution: our service is now available in Frankfurt and all the data will be stored in German...
Read More →
What is a single-page application?
Fundamentals of a single-page application with server-side rendering, and the pros and cons of using such a technique in web properties.
Read More →
A guide to the hybrid cloud networking landscape
Orchestrating a hybrid cloud of containers and other services needs a networking solution to communicate. We show you the options and what we use.
Read More →
Six essential things you need to know about GDPR
Six essential things you need to know about GDPR
Read More →
Private Docker registry with Exoscale object storage
How to setup and run a secure and scalable private Docker registry on top of Exoscale object storage.
Read More →
Five years and counting
Exoscale celebrates its 5 year anniversary as European cloud provider
Read More →
Exoscale awarded the 10’000 CPUs phase 3 of the Helix Nebula Science Cloud
Exoscale awarded the 10’000 CPUs phase 3 of the Helix Nebula Science Cloud
Read More →
Self-hosting videos with HLS
Putting videos on YouTube is a convenient solution to host a video, but not a privacy-friendly one. Using HLS, it's possible to self-host videos while...
Read More →

Managing your existing infrastructure with Terraform
Terraform is a powerful tool to manage an infrastructure. We show how to manage existing resources such a Virtual Machine and Security Group and scali...
Read More →
Understanding MySQL Queries with Explain
Learn how to use the EXPLAIN keyword to better understand what's going on in your MySQL queries and where you might apply some tweaks.
Read More →
How to implement centralized logging for your machines at Exoscale
Learn why centralized logging is important and how you can implement a simple syslog server it at Exoscale.
Read More →
Keeping MySQL in check: real life advice to tame daily performance degradations
Find out how to monitor your MySQL database with a bash script, including how to check for slow queries and kill them.
Read More →
Frankfurt zone, and new logo
DE-FRA-1 is available immediately
On the heels of the recent Vienna Zone announcement, we are proud to unveil the next step in helping Exoscale grow ...
Read More →
Replacing Modern Tools With Retro Linux Commands
A story of replacing some functionality of expensive GUI tools with ancient Linux terminal commands.
Read More →
Advanced Secure Shell: 6 Things You Can Do With SSH
Advanced SSH techniques and when you might need them.
Read More →
DHCP server for privnet using Ansible
A guide to setup a DHCP server answering request to automatically configure private networking interfaces of all your instances using Ansible
Read More →
Announcing Vienna Arsenal Zone General Availability
AT-VIE-1 is available immediately
It is with great pride that I announce the availability of AT-VIE-1, a new Exoscale zone in Vienna, marking our fir...
Read More →
Getting Your Server Notifications Zapierized
Get Zapping with example code of how to use Zapier to connect services and run actions when events are triggered.
Read More →
Introduction to OpenShift on Exoscale
Read this short introduction to OpenShift. Get pointers on how to use this versatile container platform from Red Hat.
Read More →
Confessions of a Sysadmin
Confessions of a sysadmin - because we all started somewhere. Teea Alarto, Senior Software Engineer, shares her story.
Read More →
Exoscale BYOD: Build Your Own Desks
A different approach to BYOD at Exoscale. Build Your Own Desk instead of Bring Your Own Device.
Read More →
Free Bandwidth Increase: From 100 GB to 1 TB
More bandwidth for you: Exoscale is raising free bandwidth from 100 GB to 1 TB per month.
Read More →
Building an IPsec Gateway With OpenBSD
A step by step guide to the typical private network use-case on Exoscale
Read More →
Introducing Private Networks
Exoscale is introducing private networks so you can connect your instances with each other for all your private network needs.
Read More →
Behind the Scenes: Security Groups
A look behind the scenes of security groups - what are they and how do they work under the hood?
Read More →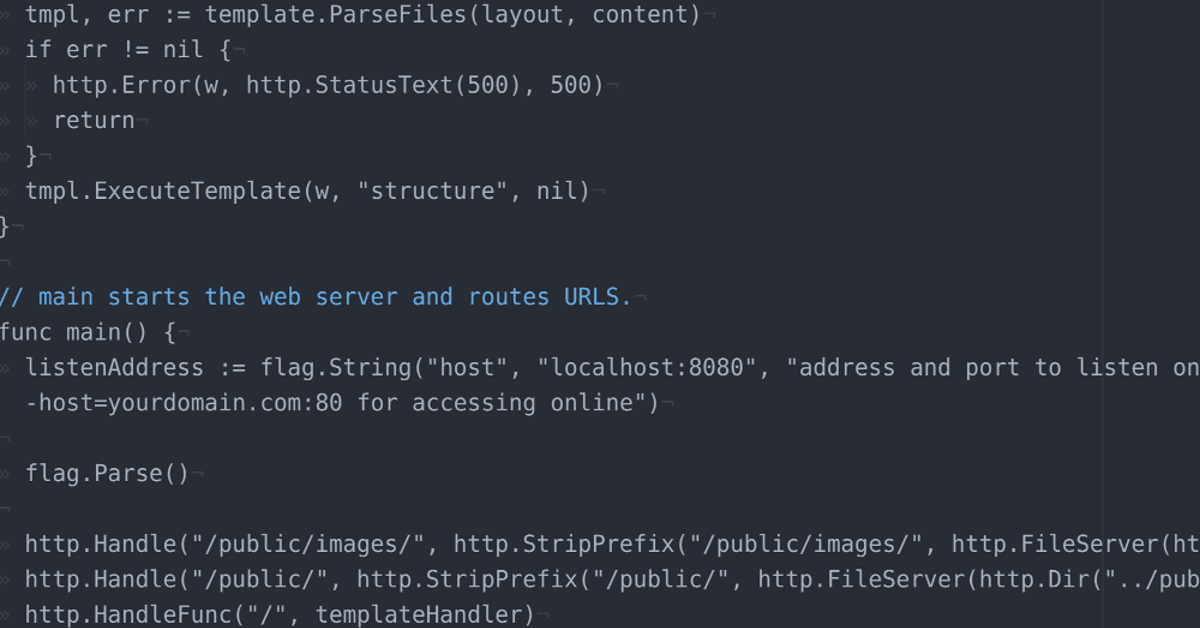
One Package to Serve the Web
A tutorial on how to use a bare instance, install one package, and run your website on it.
Read More →

Scientific Data Computing at CERN with Exoscale
CERN using Exoscale to compute scientific data.
Read More →Elastic IP addresses available at DK2
We encourage you to provision at least one Elastic IP address per zone & use DNS round-robin records through the Exoscale DNS service.
Read More →
Introducing the Exoscale Mentor Program
Here's how it works: Refer Exoscale to a friend, help them go cloud native
and both of you get a reward. Yes, it's really that simple.
Read More →Cloudflare and SHA-1: An important note on security
Cloudflare and SHA-1: An important note on security
Read More →
HAProxy Elastic IP Automatic failover
HAProxy Elastic IP Automatic failover. Cloud-native failover with exoip.
Read More →


Data underground: a glimpse into our DK2 data centre
Former Swiss military bunkers have left large secure spaces that can be put to new uses: for example as high security data-center to keep your data sa...
Read More →
Terraform on Exoscale
Terraform lets you manage your infrastructure on multiple providers using simple configuration files. Here's how to get started with Terraform on Exos...
Read More →

Introduction to container orchestration: Kubernetes, Docker Swarm and Mesos with Marathon
A guide to get started with container orchestration including how to evaluate the main container orchestration options: Kubernetes, Docker Swarm and M...
Read More →
Bioinformatics: introduction to using BLAST with Ubuntu
Read our guide to getting the BLAST bioinformatics software up and running on Ubuntu on Exoscale's cloud and performing your first query, as part of o...
Read More →
Introduction to NoSQL query
How do we query NoSQL databases? Here's an overview of the different query methods, including new SQL-like languages for non-relational databases.
Read More →
Deploying Nginx with Ansible
Learn how to deploy Nginx using Ansible, complete with an Ansible playbook you can clone from Github.
Read More →
Multi-host Private Networking with Docker
Learn how to create a multi-host private network with Docker, Docker Machine and Docker Swarm on the cloud. We show you how to setup such a network in...
Read More →
Get started with the Exoscale API client
Learn to automate your cloud deployment with the Exoscale API client. We show you how to execute simple operations on your Instances from the command ...
Read More →
Snow is falling, and so are our prices
Reliable cloud hosting is now cheaper with Exoscale's new pricing
Read More →

Anti-Affinity: ensure your instances run on different Hypervisors.
Anti-Affinity Groups | Exoscale Cloud Hosting Blog
Read More →
Get in the zone: simple and efficient DNS hosting at Exoscale
Exoscale DNS service gives you great flexibility and automation to host your Zones
Read More →
Introducing SOS
SOS - simple object storage - is an S3 compatible and let you architecting applications with better reliability, and speed than just the filesystem.
Read More →
Team Work Spaces: Organizations on Exoscale
Organizations are team workspaces where different users can operate on a common account with its own billing.
Read More →
How to build a VPN SSL server on exoscale
OpenVPN enables secure client to server or network connections via a single TCP or UDP port encrypted with SSL. It is the perfect companion for a rapi...
Read More →
Exoscale launches the first Swiss Platform as a Service - PaaS
During the dotScale 2014 Paris conference, Exoscale launched the first Swiss PaaS solution. Platform as a Service simplifies the deployment and scalab...
Read More →
Install KVM on a virtual machine to get nested instances
It might be usefull sometimes to run virtual machines on top of a virtual machine.
Install KVM in your instance apt-get install qemu-kvm virt-top libv...
Read More →
vCloud API with curl and python
We often talk about our Open Cloud product here on this devops oriented blog. One thing worth noticing is that almost everything we state on our Apach...
Read More →
Bootstrap your instances with CloudInit and User Data
User-data is now a commonly used format to make an instance do stuff while it boots. It consist of a file that is served to a booting instance and inc...
Read More →